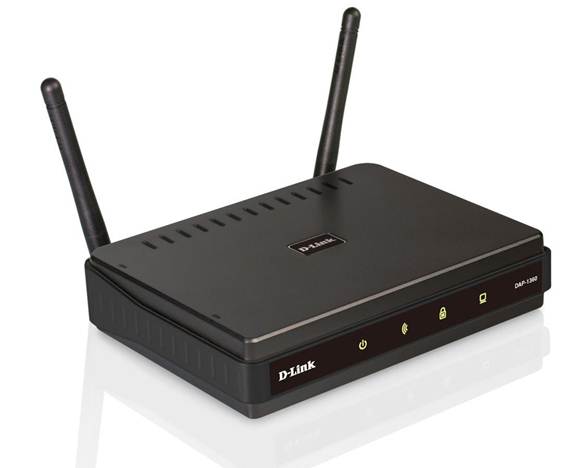
D-Link is a very popular brand in home and office networking. The DAP1360 is a single band wireless n range extender that can help extend the range of the wireless networks within home and office. This can help reduce the wireless dead spots that can sometimes affect the wireless connectivity and overall experience.
Wireless Specifications: The D-Link DAP1360 is single band wireless range extender that can operate in the 2.4 GHz range. In this frequency range it is also backward compatible with the wireless b/g standards. Even devices using 802.11b/g PCI cards, USB dongles and Cardbus adapters can connect to the wireless access point and access the network and the internet.
With dual antenna, this device can provide extended coverage and support higher data rates even in presence of interference. The device can provide Whole Home Coverage ensuring that there are fewer wireless dead spots.
Wireless Security: The DAP1360 comes with a host of security features that ensures secure wireless networks and protects from internet attacks too. It comes with advanced firewall features that can manage the content being shared over the wireless network and also define the access granted to various connected devices based on MAC address filtering.
On the wireless encryption front, the device supports Wired Equivalent Privacy (WEP) and Wi-Fi Protected Access (WPA) standards. DAP1360 supports 64-bit and 128-bit WEP encryption WEP encryptions that are compatible with most of the wireless devices. The device supports four flavors of WPA, namely WPA, WPA2, WPA-PSK and WPA2-PSK. The PSK versions have a pre-shared key that makes the encryption stronger and the network more secure.
The device also supports WPS PIN or Wi-Fi Protected Setup Personal Identification Number that allows new access points to be added to the network with ease. The Wi-Fi Protected Setup Push Button Configuration (WPS PBC) allows new devices to be added to the network securely and easily without having to access the web based configuration interface for setup.
Wireless Operation Mode: The device supports seven wireless operating modes. The table below has a summary of the modes.
| Operating Mode | Description |
| Access Point Mode | Acts as the wireless network hub to provide wireless connectivity to connected devices |
| Wireless Client Mode | Typically used to provide wireless connectivity to Ethernet based devices like gaming consoles to that they can connect and be accessed over the wireless network |
| Repeater Mode | In this mode, the device acts as a range extended for the root access point. It does not provide an independent connectivity solution, just extends the connectivity for the root access point |
| Bridge Mode | In this mode the device acts as a bridge for connecting the wireless devices into the larger network – enterprise and/or wireless |
| Bridge with Access Point Mode | This mode is a combination of access point as well as bridge operating modes. |
| WISP Repeater Mode | This mode provides connectivity to wireless devices serviced by the Wireless Internet Service Provider |
| WISP Client Router Mode | This mode is an enhancement to the WISP repeater mode where the access point can extend the service to wired Ethernet based devices too |
What’s in the Box?
The DAP1360 comes with all the accessories to setup the device and the wireless network. The package contains the following things:
- D-Link DAP1360
- Power Supply
- Ethernet Cable
- CD with user manual and other important details
- Quick in stallion guide
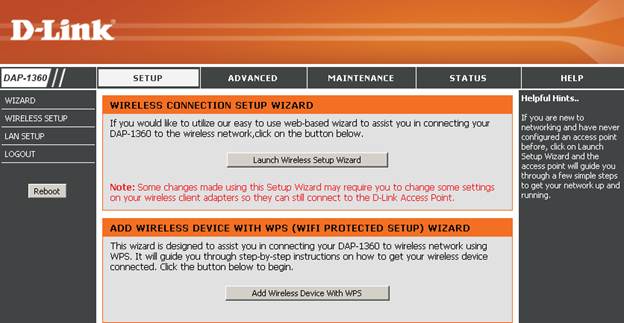
Accessing the Configuration Menu: Once a wireless network is established, newer access points and devices can be added to it using the WPS PBC and WPS PIN options but for the initial setup, the configuration needs to done manually. Typically, if administrator does not want to use the WPS solution, even then the web browser configuration would be used.
The default IP address for these access points is 192.168.0.50. Hence any computer being used for configuring DAP1360 must be in the same subnet. Computer can be given a static IP address say 192.168.0.251 with subnet of 255.255.255.0. Once configured, follow the steps below to access the setup.
- Power up the access point using the power adapter.
- Connect the access point to the computer using the Ethernet cable
- Launch the browser on the computer and type in the following URL. http://192.168.0.50
- Enter the username as admin and leave the password as blank.
- The Wireless Setup wizard is launched.
- Using the various menu items one can configure the access point as required


