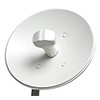
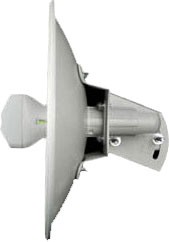
Ubiquiti NanoBridge M2 – Providing a Stable Bridge between Two Users
General Product Details
When the Ubiquiti NanoBridge M2 entered the market, for the most part, current technology was lacking in usability and more importantly durability, especially in all-weather climates. The NanoBridge M2 has attempted to rectify this problem by introducing a truly cost-effective durable bridging solution from a reputable company with a proven track record in delivering top quality products to the masses – Ubiquiti.
Wireless Specification
The antenna is a combination of technology assembled by Ubiquiti to fill a gap in the market pairing their Interfeed and AirMax technologies. Whilst the pairing of these two products into this somewhat larger counterpart may seem simple and fairly straight forward, the resulting power and range is amazing. The antenna is capable of relaying 100Mbps in most outdoor environments up to a 30km range.
Deployment Details
This antenna is designed for the outdoors environment and as such features fantastic durability in most environments from the extremely cold to scalding heat. In a similar style to other products developed by Ubiquiti the device is finished in a matt white colour with slender lines forming the dish supporting the antenna on its wall bracket. The antenna can work in extreme temperatures from a minimum of -30C to a maximum temperature of +75C removing a limiting factor to potential places for deployment.

The antenna requires a power supply of 24V, which can either be provided by directly plugging it into a power socket, or by the PoE (Passive over Ethernet) system by plugging the Ethernet cable (supplied with the antenna) to its transformer which in turn must be plugged into a power source. A mounting kit including the pole and bracket to affix the antenna and the dish to the side of a building or the top of a roof for example is included with the package so you shouldn’t need to purchase one separately. They are in the same style as the antenna itself so the whole bundle blends together in an aesthetically pleasing manner.
Configuring the Access Point
There really isn’t much configuration to go along with this product as it is primarily a static fixed piece of equipment. However, we have provided basic instructions for its assembly below:
1. The first step is to install the fee support to the dish bracket using the 4 spring-lock screws.
2. Secondly, you need to attach the bracket which sits on to the dish itself, again by using the provided screws and washers.
3. Next, begin by connecting the network cable to the antenna feed – we suggest that you pass the cable through the hole in the dish at the back prior to attaching the antenna. After, you can safely attach the antenna to its support on the dish.
4. If necessary, you can then attach the antenna to a mount pole, either the one that’s provided or a separate pole you have purchased. The pole should then be affixed to the mounting bracket which will secure the structure to either a wall or a roof.
